
RFID RC522
Step 1: Upload the Test Code
- Connect the Arduino UNO to your computer using a USB
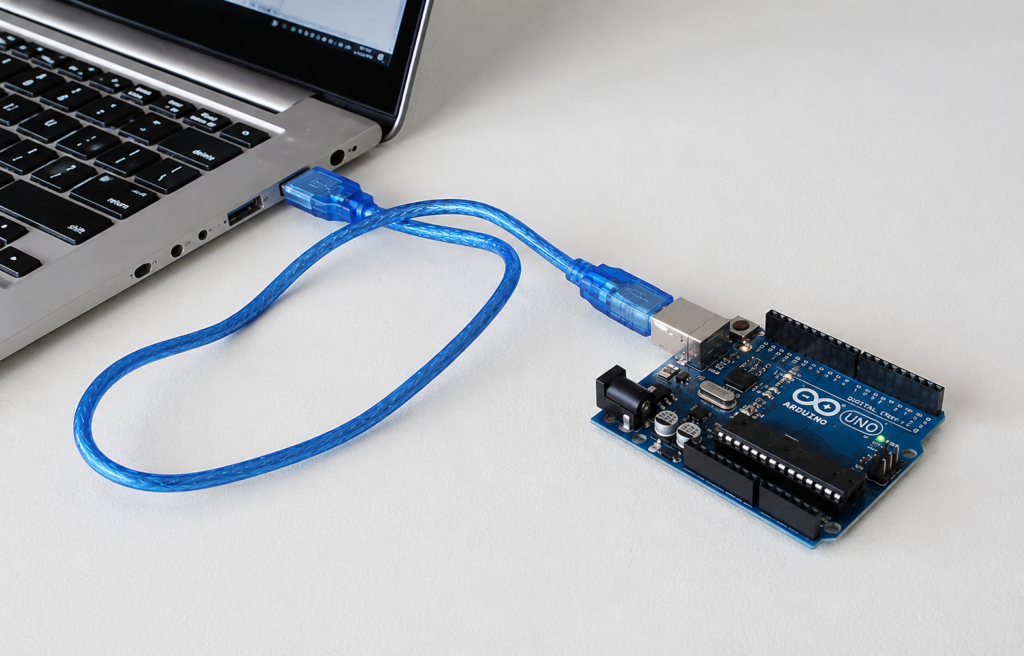
Figure 1.1: Arduino Uno Connection
- Open the Arduino IDE.
- Install the required library:
- Library: MFRC522 by Miguel Balboa
- Then upload the following test code.
#include <SPI.h>
#include <MFRC522.h>
#define SS_PIN 10
#define RST_PIN 9

    MFRC522 rfid(SS_PIN, RST_PIN);

void setup()
{
    Serial.begin(9600);
    delay(200);

    Serial.println("RC522 UID Reader - Started");
    Serial.println("Place card / tag near antenna");
    SPI.begin();
    rfid.PCD_Init();
    Serial.print("MFRC522 Firmware Version: 0x");
    byte version = rfid.PCD_ReadRegister(rfid.VersionReg);
    Serial.println(version, HEX);
}

void loop()
{
    if (!rfid.PICC_IsNewCardPresent()) return;

    if (!rfid.PICC_ReadCardSerial()) return; Serial.print("Card UID: ");

    for (byte i = 0; i < rfid.uid.size; i++)
    {
        Serial.print(rfid.uid.uidByte[i], HEX);
        Serial.print(" ");
    }

    Serial.println();
}
Figure 1.2: RFID Test Code
✔ If the code uploads successfully and shows “ Upload Done ” , your Arduino board is working correctly.
Step 2: Turn OFF Power
- Before connecting the RFID module: Unplug the USB cable from the Arduino.
- This prevents wiring
Step 3: Connect the RFID Module
- Connect the RC522 module to the Arduino UNO as shown below
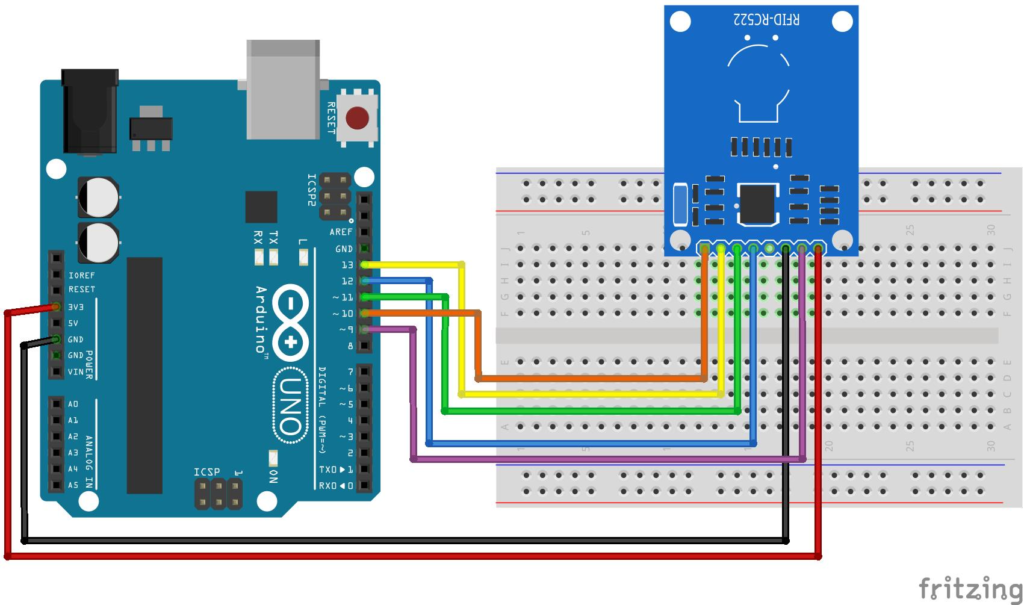
Figure 1.3: RFID Circuit Diagram
RFID Pin | Arduino Pin |
3.3V | 3.3V |
RST | D9 |
GND | GND |
IRQ | Do not connect to any pin |
MISO | D12 |
MOSI | D11 |
SCK | D13 |
SDA | D10 |
- Afterwiring:
✔ Plug the USB cable back into the Arduino.
✔ Press the RESET button on the Arduino.
Step 4: Open Serial Monitor
- In the Arduino IDE:
✔ Click Tools → Serial Monitor
✔ Set Baud Rate = 9600
- You should see something similar to:
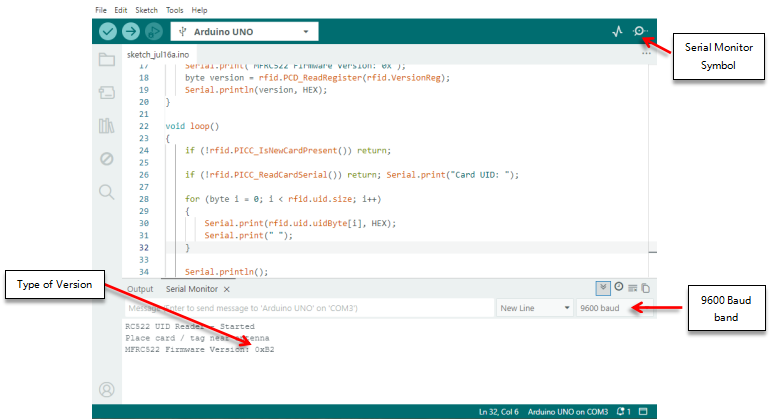
Figure 1.4: RFID Version Test
✔ This means the RFID module is communicating with the Arduino.
Step 5: Scan an RFID Card
- Place the RFID card or tag on the module antenna.
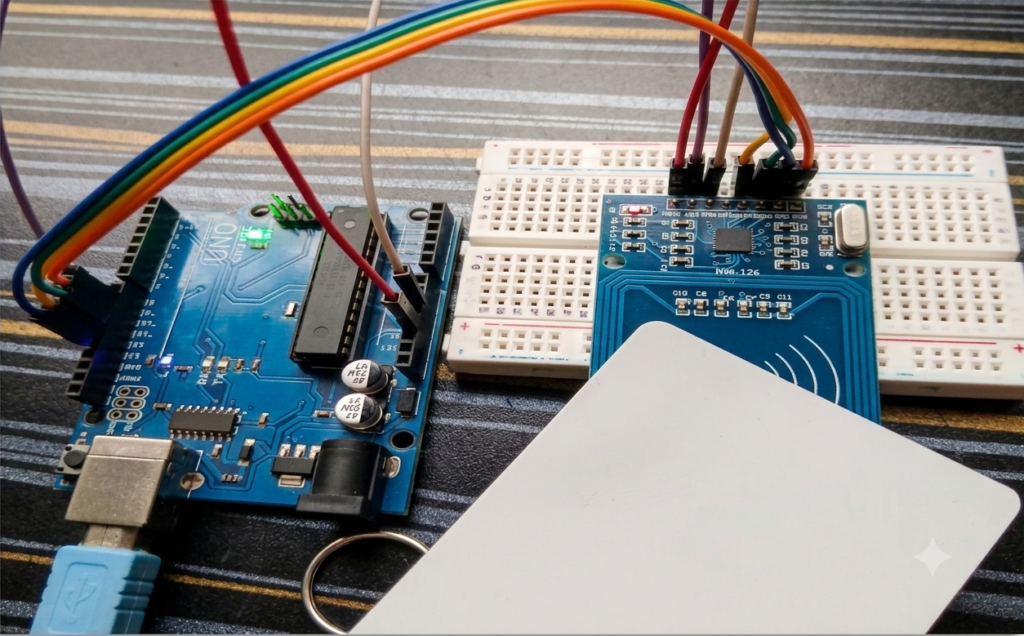
Figure 1.5 : RFID Card Reading
- The Serial Monitor should display something like:
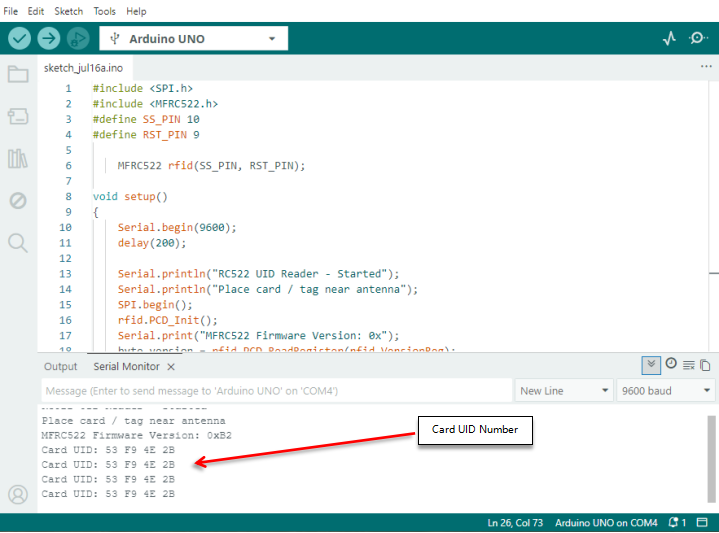
Figure 1.5 : RFID Card UID Number
✔ This means your RFID module is working correctly.
Step 6: If the Module Is Not Working
- Check the following common issues:
✔ Incorrect Wiring : Make sure every pin is connected to the correct Arduino pin.
✔ Loose Jumper Wires : Check that jumper wires are firmly connected.
✔ Poor Soldering : Bad solder joints on the module pins can cause connection problems.
✔ Incorrect Library Make sure you installed : MFRC522 by Miguel Balboa
✔ Very Long Wires : Long jumper wires can cause communication errors.
Step 7: Power Supply Fix (Important)
- Sometimes the Arduino 3V pin does not provide enough power.
- Try this solution:
✔ Disconnect the RFID 3.3V wire from Arduino 3.3V pin
✔ Connect it to the Arduino Uno VIN pin instead.
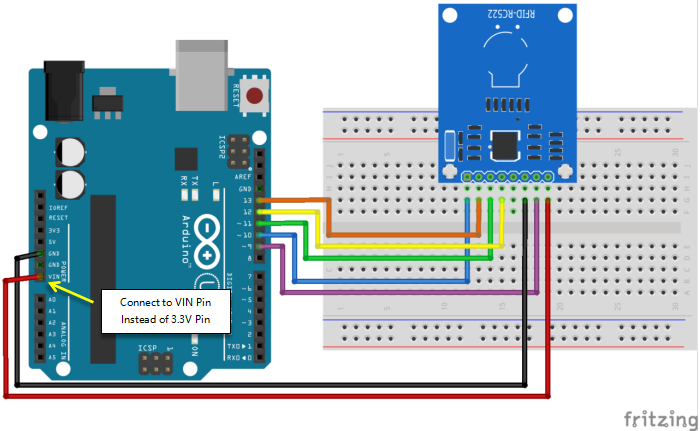
Figure 1.6: RFID Troubleshooting pin connection
- Then:
✔ Unplug the USB cable
✔ Wait a few seconds
✔ Plug the USB cable again
✔ This can provide more stable power to the RFID module
Step 8: Test Again
- Place the RFID card on the module
- If everything is correct, the UID number will appear in Serial Monitor.
✔ Your RFID module is now ready to use.
! Support
- If you still face issues, please contact our support team.